In 2022 GeoSLAM was acquired by FARO Technologies.
GeoSLAM products, resources and expertise have been integrated into the FARO Technologies network. Find everything you need now on the FARO website.
Meet the ZEB family of laser scanners
GeoSLAM makes it easy to capture and connect data from the world around us. From the built environment to the natural world, GeoSLAM technology gives people the power to collect geospatial data from some of the most difficult environments, whether they are indoor, outdoors, underground – everywhere.
Click on each product to find out more

ZEB Go
ZEB Revo RT
ZEB Horizon
ZEB Horizon RT
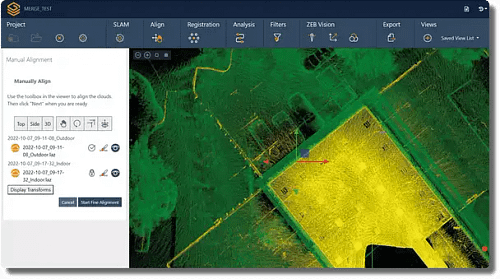
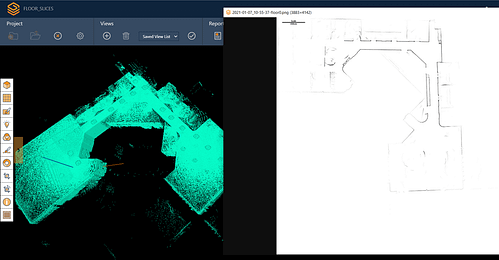
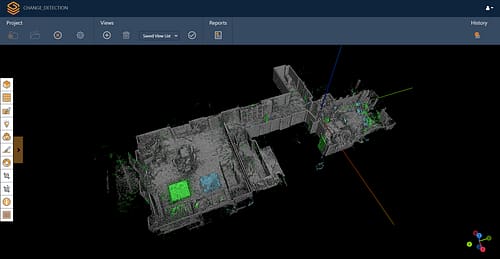
Sample data
Explore the dataset by changing the controls
Market leader in SLAM
For anyone involved in the acquisition of geospatial data, SLAM is a complete game-changer. With a SLAM mobile mapping system, it’s possible to simply walk through an environment, building a digital map as you go.
The SLAM technology used in GeoSLAM products is continually enhanced and developed to ensure it is robust, reliable and optimised for different capture environments.
Don’t just trust us

Modern Survey
1- Strong technical support team
2-Easy to use and process the data
3-The coverage range of ZEB Horizon
4-Produce good quality of data
Lakhan Lal – Local guide
Most supporting technical team for back end as well as front end. Easy to use to produce high quality data
and minimises the project
completion time.
Geometra Barlocci Maurizio
We recently purchased the ZEB Horizon, excellent product that manages to give us a considerable amount of data in a short time while maintaining very high data quality, plus in colour and with spherical photos thanks to the ZEB Vision.
Find out more
Latest news and resources

Press Release
FARO Acquires Mobile Scanning Market Leader GeoSLAM
See how FARO® Technologies, Inc., a global leader in 4D digital reality solutions, acquisition of GeoSLAM represents the next step in the growth of GeoSLAM and the establishment of mobile mapping as a driver for growth in the way businesses map and understand their spaces.
Generating efficient construction site surveys with mobile LiDAR
Generating efficient construction site surveys with mobile LiDAR Mobile LiDAR technology has…
Boosting efficiency with mobile LiDAR for urban planning
Boosting efficiency with mobile LiDAR for urban planning Over 50% of the…
Enhancing emergency planning using risk assessment tools like mobile LiDAR
Enhancing emergency planning using risk assessment tools like mobile LiDAR Modern day…
Top resources
Trusted by thousands of companies, including: